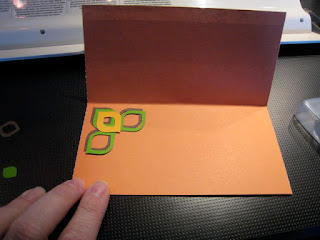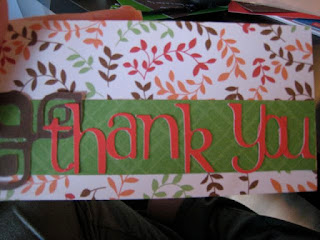

I have so many wonderful friends and neighbors who have been so good to me during this pregnancy - it is time to thank them. I haven't ever made my own Thank You cards before, so I decided to give it a try. I used the Home Accents cartridge for the images and Plantin Schoolbook Tall Ball font for the words. It is a pretty basic card, but I like plain and simple - not too complicated or overdone.
MATERIALS NEEDED FOR THIS PROJECT: (Makes 4 cards per patterned sheet of paper)
Cricut machine (Speed - High; Pressure - Max; Blade - 4)
Cutting Mat
Spatula
Plantin Schoolbook font cartridge
Home Accents cartridge
scissors/paper cutter
glue/adhesive
1 sheet patterned paper - 12 x 12
1 sheet accent patterned paper - any size - for strips
1 8 x 8 square of solid colored paper per color (I used 4 colors)
STEP ONE: CUT, FOLD AND PREPARE YOUR CARD
1. Cut the 12 x 12 patterned paper into four equal squares, then fold each one in half
2. Cut strips of your accent piece of patterned paper and glue across the front
1. Load first 8 x 8 color of paper
2. Using Home Accents cartridge, select the Border 6 image set to 1 1/2 inch (select 4 times)
3. Press Cut
4. Unload paper and remove paper and images from the cutting mat
Note: you will need 8 images cut from at least one of your colors for use on the front of the card
7. Press SHIFT and then the Border 6 design for the accent image
8. Cut 4 images, Unload paper and remove from mat
9. Load fourth color/font color
10. Change cartridge to Plantin Schoolbook (or your font of choice) Press Tall Ball option
11. Type in "thank you", set size to 1 1/4 inches.
12. Press Cut, then Unload and remove letters from the mat
1. Layer three colors for the inside of the card, applying the Border 6 accent last

2. Apply image to the front

3. Glue "thank you" on to the strip


VOILA! Simple and so cute.


1 comment:
Holy crap you have a great eye for design. I love all the stuff you've made!
Post a Comment