Thursday, February 26, 2009

Nursery Update


The nursery is coming right along. In fact, I'd say it was darn near complete. There are only two things missing - the glider/ottoman and two frames that go above the crib.

At our baby shower, baby and I sort of made out like bandits! All of the darling gifts we received have been hung, set up or put in their place and boy am I ready - she just needs to cook and grow for a couple more months. Having the shower early was really great - I wanted to make sure my mom and step-mom could both be there and this was the best date - but it makes for a long 2.5 months remaining in my pregnancy! :-) Nesting is so fun!


Sunday, February 22, 2009

Thank You Cards


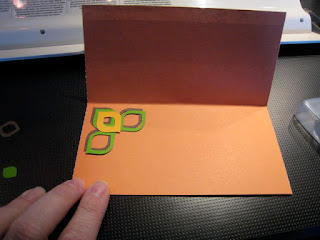
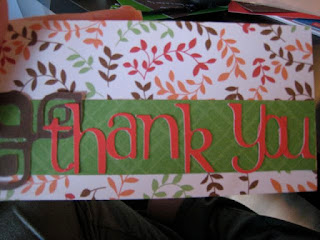
Using the same basic layout and tweaking it a little, I made my first set of Thank You cards, or a set of cards of any kind for that matter!  I used a stamp pad to antique the edges, the Cricut for shapes, some scraps from previous projects, some paper I bought at Wal-Mart and a few embellishments. It was fun and I will have lots left over!

My dad had a bunch of school pictures in a packet so I decided I would make my first attempt at a real live scrapbook page. That will likely be the next little project I take on.

Wednesday, February 18, 2009

Ribbon Lamp Shade


I found this lamp base at Wal-Mart for $8.95. There was a white lamp shade on clearance for $5 so I got it and hot glued various ribbons to the top. I trimmed each ribbon with pinking shears on both ends, glued them on, then added the pink ribbon at the bottom of the shade, the brown ribbon at the top of the shade for trim and the pink satin bow. I love how it looks in the nursery! Too bad I can't find a light bulb!

Coming soon:  Card making!  I can't believe I actually made all these cards!  Thank you, Cricut, for giving me the ability to be crafty when I never thought I could be. It has been a really fun project.  They are not done yet, but I will post when they are.  


Flower Hooks for headbands & clippies

I bought these cute flower hooks at Wal-Mart, then painted them and hot glued a ribbon to the back to hold flower clips.  They are for my 6 year old niece, Sophie, as a hostess gift.  She is giving me a baby shower with my sister, her mom and my mother-in-law this weekend.  I also made her a big girl sized tutu.  I can't wait to give them to her!

Friday, February 6, 2009

Headband/Bow Holder


I saw a cute bow holder online somewhere - probably Etsy.  Yesterday at Wal-Mart I saw some cute unfinished flowers and other shapes with hooks on them.  I bought one, painted it white and applied some Hot Pink vinyl using the Plantin Schoolbook cartridge.  Tall Ball Grass. Then the word "Grow" from the Home Accents cart - hot pink is Shadow and white is normal.

The one I saw had ribbons glued under each hook, dropping down about 14 inches below the bottom of the hook to hold clips & bows, but I already had the bow holder so I didn't do that. 

Sweet Treats Jar


Another friend's birthday is tomorrow. I found this cute cookie jar at Wal-Mart (I live in a small town - not many other places to shop than Wal-Mart). Using the Accent Essentials cart, I cut a couple images and then placed my Plantin Schoolbook Tall Ball lettering on top.

I made the card using Tags, Bags and Boxes and some flowers/brads.

Hmmmm....what should I fill it with? Something yummy...

Wednesday, February 4, 2009

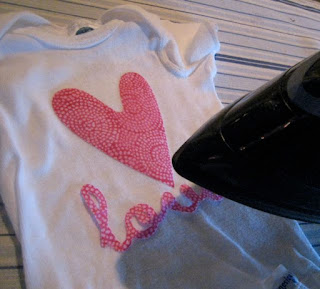
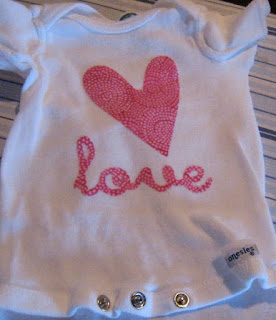
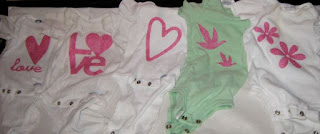
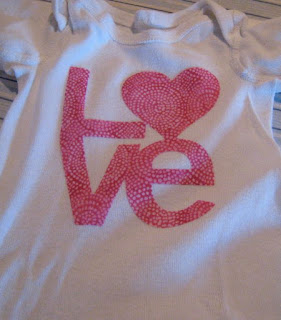
Funsie Onesies


Fabric and the Cricut - my mind is spinning with possibilities of future projects - aprons, canvas bags, T-shirts, jeans, and on and on and on.

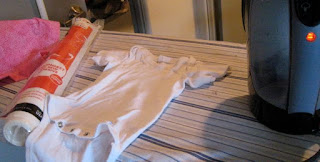
All you need is some Heat N Bond, cute fabric and something to stick it on to.

MATERIALS NEEDED FOR THIS PROJECT:

• Cricut Machine - Pressure: Max; Speed: Med; Blade: 5
• Cutting Mat
• Scissors
• Heat N Bond
• Fabric
• Onesies
• Iron/ironing board, set to Low or Wool


STEP ONE: APPLY HEAT N BOND TO FABRIC

1. Cut 12 x 12 or 12 x 24 pieces of fabric and Heat N Bond
2. Follow directions to bond them together

STEP TWO: CUT YOUR IMAGES

1. Place your fabric/Heat N Bond onto the cutting mat and press Load
2. Press the Multi-Cut button
3. Select your image, size and press Cut.
4. Unload your fabric and remove from cutting mat.


STEP THREE: PEEL AND APPLY

1. Peel paper backing off fabric image.

2. Place image in desired place on Onesie.

3. Iron on, following Heat N Bond instructions (8-10 seconds, usually)


Another cute Cricut project!

Birthday Tray


For my friend's birthday, I applied some Cricut images to a cute wooden tray.  Simple and easy to do, it was perhaps the easiest gift I've done so far.

You already know how to cut vinyl by now, and the application is the same as always so I will forego the instructions and just show you the pictures.

I later added a little character by dabbing a little brown paint mixed with water over the vinyl, then wiping most of it off. 


Tuesday, February 3, 2009

Home Accents Thank You Card


I have so many wonderful friends and neighbors who have been so good to me during this pregnancy - it is time to thank them. I haven't ever made my own Thank You cards before, so I decided to give it a try.  I used the Home Accents cartridge for the images and Plantin Schoolbook Tall Ball font for the words. It is a pretty basic card, but I like plain and simple - not too complicated or overdone.  

MATERIALS NEEDED FOR THIS PROJECT: (Makes 4 cards per patterned sheet of paper)

Cricut machine (Speed - High; Pressure - Max; Blade - 4)
Cutting Mat
Spatula
Plantin Schoolbook font cartridge
Home Accents cartridge
scissors/paper cutter
glue/adhesive
1 sheet patterned paper - 12 x 12
1 sheet accent patterned paper - any size - for strips
1 8 x 8 square of solid colored paper per color (I used 4 colors)

STEP ONE: CUT, FOLD AND PREPARE YOUR CARD

1. Cut the 12 x 12 patterned paper into four equal squares, then fold each one in half
2. Cut strips of your accent piece of patterned paper and glue across the front


STEP TWO: CUT CRICUT DESIGNS AND LETTERS

1. Load first 8 x 8 color of paper
2. Using Home Accents cartridge, select the Border 6 image set to 1 1/2 inch (select 4 times)
3. Press Cut
4. Unload paper and remove paper and images from the cutting mat

Note: you will need 8 images cut from at least one of your colors for use on the front of the card

5. Repeat with second color


6. Load third color 
7. Press SHIFT and then the Border 6 design for the accent image
8. Cut 4 images, Unload paper and remove from mat

9. Load fourth color/font color
10. Change cartridge to Plantin Schoolbook (or your font of choice) Press Tall Ball option
11. Type in "thank you", set size to 1 1/4 inches.
12. Press Cut, then Unload and remove letters from the mat


STEP THREE: GLUE YOUR IMAGES AND LETTERS TO YOUR CARD

1. Layer three colors for the inside of the card, applying the Border 6 accent last


2. Apply image to the front


3. Glue "thank you" on to the strip


VOILA! Simple and so cute.

Sunday, February 1, 2009

Those To-Die-For Flower Clips


I was invited to a really, really fun and REALLY, REALLY girly party the other day.  My friend Misty had Scentsy and those absolutely adorable crocheted beanie/headbands with all the flower clip accessories.  They had a bunch of super cute newsboy caps, too.  It was all so girly and I was so happy to be part of something so dang feminine since my life usually consists of dirty boys and rough and tumble sports.  Not that I would trade it!  It's just a nice addition.

So, after I bought two of those must-have flowers and four headbands, and spent a grand total of $31.95, I had a touch of buyer's remorse.  I ALWAYS get buyer's remorse.  I love a bargain, though, and it lessens the regret significantly. So I went to Robert's with the intention of making my own flower clips.  Like the tutu attempt, they may not turn out as cute, but they are good enough since the price is right.

MATERIALS NEEDED FOR THIS PROJECT:

• Assorted colors and sizes of craft flowers. 


• Hot glue gun and glue


• Alligator clips - I got mine at Wal-Mart, but they are a little too bulky. Look for the flattest clip you can find.


• Buttons, brads or other flat embellishments for the center


STEP ONE: Choose and layer your flowers


Call this a practice run.  Layer your flowers together to see how the finished one will look.


STEP TWO: Glue or Brad together


On some of them, I hot glued them and on others I simply used a decorative brad. 


STEP THREE: Glue to alligator clip


And you're done!  Super cute.  We (my two older boys helped) made twelve of these adorable accessories.


Hot glue gun technique:


Check out the adorable collection we made for the baby! Here are a bunch of pics from our project: