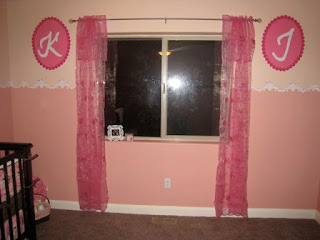


Wow! Time to clean the windows!
I didn't like the font I used for the initials, so I peeled them off and re-applied them today, using a different font - the Stone Script cartridge. I also applied a vinyl Dot border around the ovals to give them a little texture and depth. As a bonus, it disguised my imperfect ovals.
• Cricut Expression, 12 x 24 cutting mat, spatula, Stone Script font cartridge, Plantin Schoolbook cartridge
• (1) 12 x 24 inch sheet hot pink vinyl
• (2) 12 x 14 inch sheets white vinyl
• (1) 12 x 24 sheet transfer tape
• scissors
• masking tape
These are the settings for the Cricut:
• Blade depth set at 3
• Pressure set at Med
• Speed set at Med
• (1) 12 x 24 sheet transfer tape
• scissors
• masking tape
These are the settings for the Cricut:
• Blade depth set at 3
• Pressure set at Med
• Speed set at Med
** INITIALS **
STEP ONE - CUT
Press the PORTRAIT button. Using the Stone Script Cartridge, load your paper. Select your initals, set at 12 1/4 inches. Press CUT
STEP TWO - RELEASE YOUR IMAGE
If desired, cut any extra off to save for other projects. Peel the outline away from the initials and discard.
STEP THREE - APPLY TRANSFER TAPE
Rub your transfer tape on, making sure to rub out any bubbles.
STEP FOUR - APPLY
Remove vinyl backing. Center and apply to wall. I eyeball these things, but I don't recommend it! Use a tape measure, pencil and masking tape to get the vinyl in the perfect spot.
Rub all bubbles gently out. Peel away the transfer tape, rocking gently as you peel back.
** BORDER **
STEP ONE - CUT
Using the Plantin Schoolbook Cartridge, load your paper. I selected the CIRCLE image, set at 1 1/2" height. Press Auto Fill. Press CUT.
STEP TWO - APPLY
This pattern needed to be manually applied to the wall, one by one. I simply peeled and applied each circle, making sure the edges touched.


No comments:
Post a Comment