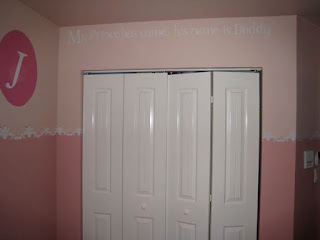
I am having my first baby girl after three boys and I am going crazy with the PINK! Come along and see what I've done so far. This was kind of a big Cricut project, but very simple and not too difficult. I will post more pictures of the finished project later. This is what I've accomplished in the last 4 days. All the vinyl was cut and applied today. This instruction details the exact design and size I used for my border project. Your size settings may be different if you use another design.
This Cricut project requires the following materials:
• Cricut Expression, 12 x 24 cutting mat, spatula, font cartridge, other cartridge
• Approx. 55 linear feet white vinyl, or less if you can repeat a pattern on one sheet
(I repeated my 16" L 3" H pattern [3] times on each 20" sheet of vinyl)
• (2) 12 x 24 sheets transfer tape
• scissors
• masking tape
These are the settings for the Cricut:
• Blade depth set at 3
• Pressure set at Med
• Speed set at Med
** BORDER **
STEP ONE - CUT
Using the Accent Essentials Cartridge, load your paper. I used the BORDER image set at
3" height. Press CUT.
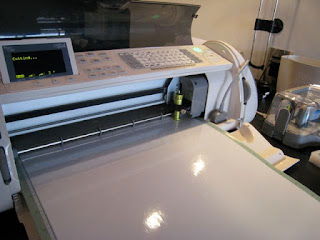
When the first image is finished cutting, press Line Return, Repeat Last, and CUT again.
When the second image is finished cutting, you should have room for one more image. Press Line Return, Repeat Last and CUT again.
** Note - this is the time to check the vinyl backing for cuts that go all the way through. Apply masking tape (on the back) to any tears or cuts that go through the backing
STEP TWO - APPLY TRANSFER TAPE
Remove the excess vinyl by peeling away from image, gently rocking back and forth and making sure not to pull the image up from the vinyl backing.
Apply transfer tape to the entire top of all three images.
STEP THREE - RELEASE IMAGES
Separate each image with your scissors. You will have 3 identical images, complete with transfer tape.
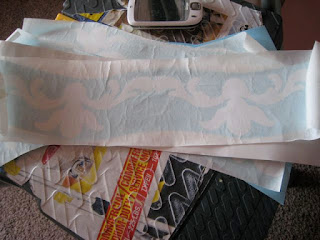
** Note: I reuse my transfer tape over and over, so the next time, just cut the images out and then apply the similarly shaped transfer tape to that image.
STEP FOUR - APPLY TO WALL
You are ready to apply!
Make sure you have a straight, level line to reference when applying vinyl to the wall. My paint line was my reference, but you can apply masking tape to the wall for your reference.
Place the image on the leveled line and rub gently onto the wall, making sure to press out any bubbles. Remove transfer tape by gently rocking back and forth. Save and reuse, or simply apply to your next image.
Here are a few BEFORE and AFTER pictures
** PHRASE AND INITALS **
I cut the initials out using Plantin Schoolbook Bold font. The phrase above the closet was done using Plantin Schoolbook Tall Ball font.


