Showing posts with label Plantin Schoolbook. Show all posts

Friday, March 13, 2009

Party Favors

For my baby shower, I was so deeply humbled to think that so many people not only wanted to be at the big event, but wanted to make sure I was having a shower in the first place.  As tradition goes, usually you have one shower for your first baby.  Well, this is my fourth baby.  I suppose the fact that she is the first and only girl after three boys has a lot to do with the heavy interest and great turn-out.  Not to mention the fact that I can't hide an ounce of my excitement, shock and satisfaction that I am finally getting the daughter I've dreamed of.  

I have to disclose that I have never wished any of my boys had been girls, I just had this overwhelming desire to raise a daughter - no matter how or when she got here.  It was definitely a risk to try for that fifth time (I had a miscarriage right before conceiving her).  I had convinced myself I would get my fourth son and I had all but given up my dream, but to my utter surprise I was blessed with the girl I always believed would come.  I still get very emotional when I think about that defining moment at my ultrasound when the doctor said, "You're having a girl!" 

My desire for a girl and the sheer thrill of knowing she was finally coming are worn on my sleeve.  I have the greatest family and friends who were gracious enough to throw and attend a shower for the upcoming Princess and me.  I wanted to show a small token of my appreciation for the very literal showering of gifts.  


I started by making Chocolate Covered Oreos.
I dipped the Oreos into Chocolate Almond Bark, 
then drizzled Vanilla Almond Bark on top (dyed pink with food coloring)

I did the opposite for the Vanilla dipped Oreos


I stuffed a couple of these rich treats into little favor bags found at Robert's
Each bag had little Baby Blocks on the front - created with the Cricut

The little champagne bottle is filled with red, pink and white M&Ms
The label says "About to Pop"

I found some cute bundles of bamboo spoons 
and green dish cloths that made up the rest of the favor

Then I stuffed it all into a diaper and gave each guest a "Full Diaper"

Though it can never fully express my gratitude, I hope the guests enjoyed the shower and the small token of appreciation they took home.

Sunday, February 22, 2009

Thank You Cards


Using the same basic layout and tweaking it a little, I made my first set of Thank You cards, or a set of cards of any kind for that matter!  I used a stamp pad to antique the edges, the Cricut for shapes, some scraps from previous projects, some paper I bought at Wal-Mart and a few embellishments. It was fun and I will have lots left over!

My dad had a bunch of school pictures in a packet so I decided I would make my first attempt at a real live scrapbook page. That will likely be the next little project I take on.

Friday, February 6, 2009

Headband/Bow Holder


I saw a cute bow holder online somewhere - probably Etsy.  Yesterday at Wal-Mart I saw some cute unfinished flowers and other shapes with hooks on them.  I bought one, painted it white and applied some Hot Pink vinyl using the Plantin Schoolbook cartridge.  Tall Ball Grass. Then the word "Grow" from the Home Accents cart - hot pink is Shadow and white is normal.

The one I saw had ribbons glued under each hook, dropping down about 14 inches below the bottom of the hook to hold clips & bows, but I already had the bow holder so I didn't do that. 

Sweet Treats Jar


Another friend's birthday is tomorrow. I found this cute cookie jar at Wal-Mart (I live in a small town - not many other places to shop than Wal-Mart). Using the Accent Essentials cart, I cut a couple images and then placed my Plantin Schoolbook Tall Ball lettering on top.

I made the card using Tags, Bags and Boxes and some flowers/brads.

Hmmmm....what should I fill it with? Something yummy...

Tuesday, February 3, 2009

Home Accents Thank You Card


I have so many wonderful friends and neighbors who have been so good to me during this pregnancy - it is time to thank them. I haven't ever made my own Thank You cards before, so I decided to give it a try.  I used the Home Accents cartridge for the images and Plantin Schoolbook Tall Ball font for the words. It is a pretty basic card, but I like plain and simple - not too complicated or overdone.  

MATERIALS NEEDED FOR THIS PROJECT: (Makes 4 cards per patterned sheet of paper)

Cricut machine (Speed - High; Pressure - Max; Blade - 4)
Cutting Mat
Spatula
Plantin Schoolbook font cartridge
Home Accents cartridge
scissors/paper cutter
glue/adhesive
1 sheet patterned paper - 12 x 12
1 sheet accent patterned paper - any size - for strips
1 8 x 8 square of solid colored paper per color (I used 4 colors)

STEP ONE: CUT, FOLD AND PREPARE YOUR CARD

1. Cut the 12 x 12 patterned paper into four equal squares, then fold each one in half
2. Cut strips of your accent piece of patterned paper and glue across the front


STEP TWO: CUT CRICUT DESIGNS AND LETTERS

1. Load first 8 x 8 color of paper
2. Using Home Accents cartridge, select the Border 6 image set to 1 1/2 inch (select 4 times)
3. Press Cut
4. Unload paper and remove paper and images from the cutting mat

Note: you will need 8 images cut from at least one of your colors for use on the front of the card

5. Repeat with second color


6. Load third color 
7. Press SHIFT and then the Border 6 design for the accent image
8. Cut 4 images, Unload paper and remove from mat

9. Load fourth color/font color
10. Change cartridge to Plantin Schoolbook (or your font of choice) Press Tall Ball option
11. Type in "thank you", set size to 1 1/4 inches.
12. Press Cut, then Unload and remove letters from the mat


STEP THREE: GLUE YOUR IMAGES AND LETTERS TO YOUR CARD

1. Layer three colors for the inside of the card, applying the Border 6 accent last


2. Apply image to the front


3. Glue "thank you" on to the strip


VOILA! Simple and so cute.

Thursday, January 22, 2009

The Nursery - Initials and Oval Dot border


Wow!  Time to clean the windows!  

I didn't like the font I used for the initials, so I peeled them off and re-applied them today, using a different font - the Stone Script cartridge.  I also applied a vinyl Dot border around the ovals to give them a little texture and depth. As a bonus, it disguised my imperfect ovals. 


This Cricut project requires the following materials:
• Cricut Expression, 12 x 24 cutting mat, spatula, Stone Script font cartridge, Plantin Schoolbook cartridge
• (1) 12 x 24 inch sheet hot pink vinyl
• (2) 12 x 14 inch sheets white vinyl
• (1) 12 x 24 sheet transfer tape 
• scissors
• masking tape

These are the settings for the Cricut:
• Blade depth set at 3
• Pressure set at Med
• Speed set at Med


** INITIALS **
STEP ONE - CUT

Press the PORTRAIT button. Using the Stone Script Cartridge, load your paper.  Select your initals, set at 12 1/4 inches. Press CUT

STEP TWO - RELEASE YOUR IMAGE

If desired, cut any extra off to save for other projects.  Peel the outline away from the initials and discard. 

STEP THREE - APPLY TRANSFER TAPE

Rub your transfer tape on, making sure to rub out any bubbles.

STEP FOUR - APPLY

Remove vinyl backing. Center and apply to wall.  I eyeball these things, but I don't recommend it!  Use a tape measure, pencil and masking tape to get the vinyl in the perfect spot.
Rub all bubbles gently out.  Peel away the transfer tape, rocking gently as you peel back.


** BORDER **
STEP ONE - CUT

Using the Plantin Schoolbook Cartridge, load your paper. I selected the CIRCLE image, set at 1 1/2" height. Press Auto Fill. Press CUT.

STEP TWO - APPLY
This pattern needed to be manually applied to the wall, one by one.  I simply peeled and applied each circle, making sure the edges touched.


Wednesday, January 21, 2009

The Nursery - Vinyl Wall Border


I am having my first baby girl after three boys and I am going crazy with the PINK!  Come along and see what I've done so far.  This was kind of a big Cricut project, but very simple and not too difficult.  I will post more pictures of the finished project later.  This is what I've accomplished in the last 4 days.  All the vinyl was cut and applied today. This instruction details the exact design and size I used for my border project.  Your size settings may be different if you use another design. 

This Cricut project requires the following materials:
• Cricut Expression, 12 x 24 cutting mat, spatula, font cartridge, other cartridge
• Approx. 55 linear feet white vinyl, or less if you can repeat a pattern on one sheet 
(I repeated my 16" L 3" H pattern [3] times on each 20" sheet of vinyl)
• (2) 12 x 24 sheets transfer tape
• scissors
• masking tape

These are the settings for the Cricut:
• Blade depth set at 3
• Pressure set at Med
• Speed set at Med


** BORDER **
STEP ONE - CUT

Using the Accent Essentials Cartridge, load your paper.  I used the BORDER image set at 3" height.  Press CUT.


When the first image is finished cutting, press Line Return, Repeat Last, and CUT again.

When the second image is finished cutting, you should have room for one more image.  Press Line Return, Repeat Last and CUT again.

** Note - this is the time to check the vinyl backing for cuts that go all the way through.  Apply masking tape (on the back) to any tears or cuts that go through the backing

STEP TWO - APPLY TRANSFER TAPE 

Remove the excess vinyl by peeling away from image, gently rocking back and forth and making sure not to pull the image up from the vinyl backing.

Apply transfer tape to the entire top of all three images.

STEP THREE - RELEASE IMAGES

Separate each image with your scissors.  You will have 3 identical images, complete with transfer tape.


** Note: I reuse my transfer tape over and over, so the next time, just cut the images out and then apply the similarly shaped transfer tape to that image.

STEP FOUR - APPLY TO WALL

You are ready to apply!  

Make sure you have a straight, level line to reference when applying vinyl to the wall.  My paint line was my reference, but you can apply masking tape to the wall for your reference.

Place the image on the leveled line and rub gently onto the wall, making sure to press out any bubbles. Remove transfer tape by gently rocking back and forth.  Save and reuse, or simply apply to your next image.


Here are a few BEFORE and AFTER pictures


** PHRASE AND INITALS **
I cut the initials out using Plantin Schoolbook Bold font.  The phrase above the closet was done using Plantin Schoolbook Tall Ball font.


Sunday, January 4, 2009

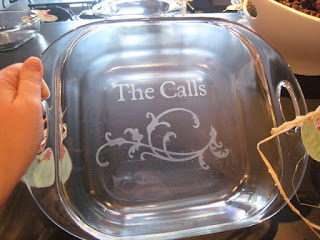
Etched Baking Pan

Note: I have the Cricut Expression.  I am not sure if the settings are different on the original Cricut.

This Cricut project requires the following materials:
Standard Cricut or Cricut Expression, cutting mat, spatula, font cartridge
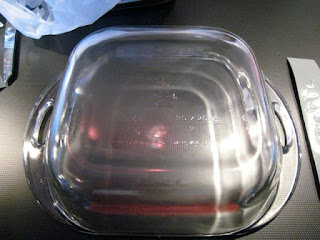
(1) 8x8 glass baking pan, glass pie pan, or other glass object
(1) 12x12 sheet of vinyl
(1) 12x12 sheet of transfer tape (you can get away with less)
masking tape
scissors
Armour Etch or other glass etching cream
warm water and soap
Windex/glass cleaner

The Cricut blade should be set to 4 for the entire project.


STEP ONE - PREPARATION

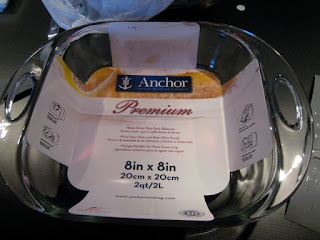
Remove all packaging and glue from baking pan.  Clean with Windex. Place face down on flat surface.


STEP TWO - CUT YOUR WORDS

Note: words and images are cut differently, at different settings.  It is best to cut all your words/letters at the same time

1. Place your vinyl sheet face down (vinyl side down) on the cutting mat.
2. Set Cricut blade to 4; pressure to High; speed to High; size to 1"
3. Insert you favorite Font Cartridge
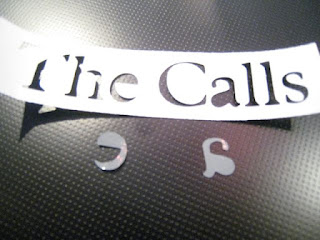
4. Type the first line (my example says "The Calls")
5. Press Load Paper
6. Press Cut

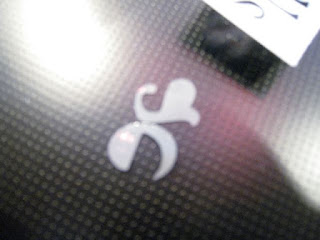
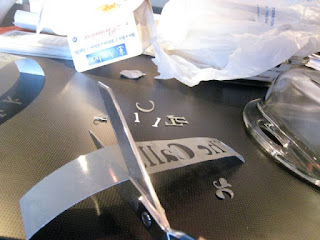
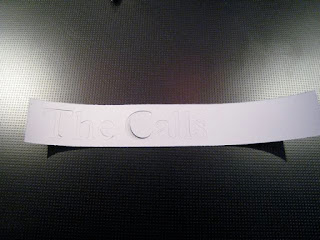
The Cricut should cut all the way through the vinyl.  Don't worry about losing some letters...you only need the stencil, not the letters.  However, be sure to save the insides of any letters that have inside pieces, such as "a" and "o"

Using the Line Return feature, continue to cut the remainder of any words or lettering you will need, using the same settings.


STEP THREE - RELEASE YOUR WORDS

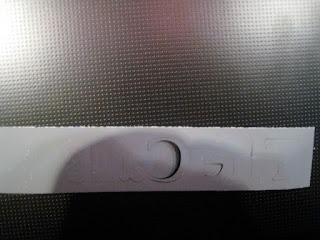
Cut your words from the vinyl sheet. They should be backwards when you are looking at the vinyl side.


STEP FOUR - REMOVE LETTERS, SAVE INSIDES, TRIM

Carefully remove all the letters from the "stencil" you have created.  Be sure to save the insides.
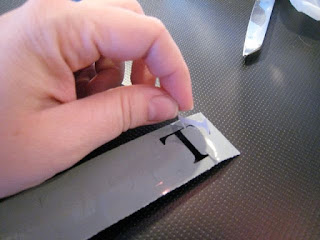


STEP FIVE - CUT YOUR IMAGES/DESIGNS

Changing your settings is very important for this step.  

1. Place the remainder of your vinyl face up (vinyl side up) on the cutting mat. 
2. Set pressure to MED, speed to MED and customize your size depending on your image.  I used the Accent Essentials Flower image set at 3 1/2 inches.
3. Select your image/design
4. Press Load Paper
5. Press Cut
 
The cut should only go through the vinyl, not the backing.  If it does cut through to the backing, use masking tape to cover the cut on the back.


STEP SIX - RELEASE YOUR IMAGES/DESIGNS

Cut the image from the sheet of vinyl. I made multiple pans, so I cut multiple images.


STEP SEVEN - APPLY THE VINYL

Note: The words and images are applied slightly differently.

Words:
1. Place your transfer tape sticky side up on a hard surface
2. Center the words, vinyl side down, using your finger to smooth it onto the transfer tape.
3. Flip the whole thing over (using the transfer tape backing) and smooth the tape onto the vinyl with a popsicle stick or other tool.
4. Peel the vinyl backing off, rocking the vinyl for easier removal.  
5. Place the vinyl where you want it on the bottom of the glass pan
6. Smooth out all the bubbles using a popsicle stick or other tool
7. Rocking the transfer tape, slowly remove from vinyl and glass.
8. IMPORTANT!!! Place the insides back in the letters


Images/Designs:
1. Peel out the image/design, leaving just a stencil.  
2. Place your transfer tape sticky side up on a hard surface 
3. Center the image/design, vinyl side down, using your finger to smooth it onto the transfer tape.
4. Flip the whole thing over (using the transfer tape backing) and smooth the tape onto the vinyl with a popsicle stick or other tool.
5. Peel the vinyl backing off, rocking the vinyl for easier removal.
6. Place the vinyl where you want it on the bottom of the glass pan
7. Smooth out all the bubbles using a popsicle stick or other tool
8. Rocking the transfer tape, slowly remove from vinyl and glass.
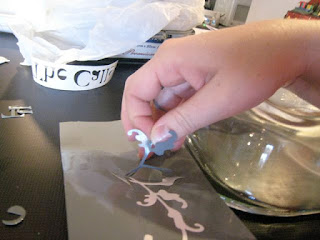
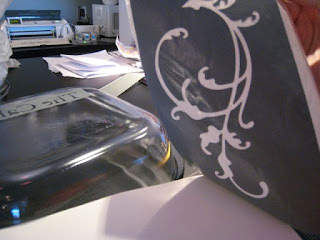
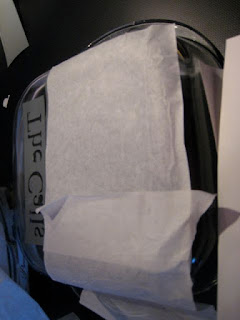

STEP 8 - TAPE OFF SURFACE AREAS AND FILL IN THE LETTERS WITH THEIR INSIDES
Note: This is an important step.  The vinyl alone will not prevent bleeding of the glass etcher, even if it's nowhere near the open glass. I learned this the hard way with my first few pans.  Masking the rest of the surface is essential for a clean design.


STEP 8 - YOU'RE READY TO ETCH!!!

Using a stencil brush or other stiff brush, apply the etching cream to the lettering and design stencils.  Brush up, down, and sideways, making sure to cover the design thoroughly.  

Let it sit according to the directions on the etching cream - mine says 5 minutes, but I let it sit for at least 10.


STEP 9 - RINSE, WASH, REMOVE, REPEAT

You are ready to see your finished project!  

1. Rinse the etching cream off with warm water.
2. Wash entire pan with dish soap
3. Remove all tape and vinyl - discard (warm water helps it come off easily)
4. Thoroughly rinse and wash with detergent again to remove all cream
 5. Windex the entire pan
6. Dry and enjoy the fruits of your labor!


Tips and Tricks:

For words, cut vinyl side down at top speed and top pressure, blade set at 4.
Use Transfer tape to apply to glass surface.
Make sure to tape off within 3 inches of the words/images - etching cream shows up even if you don't get it around the edges.

For images, set pressure at low and speed at min. This way, it will cut through the vinyl, but not through the backing.

Use an asymmetrical image for best results. It's pretty challenging to center everything perfectly.